Tuesday, January 18, 2011
{January.Hybrid} with Happy to You
Hey, Amanda here posting your monthly Hybrid goodies. I couldn't resist playing with Laura's new-re-released kit Happy to You, & the add-on that comes with it. I just LOVE the bright, cheery colors & it's no wonder; I'm in the midst of planning a double birthday party.
 The strips of paper will be used for some paper rosettes that we're going to layer behind the cupcake.


Lets get this glue & scissor party started!!
Digi-supplies: Happy to You, Happy to You Add-on by simply.scraps by Laura
Traditional Supplies: card blank, scissors, glue, mini-crystals,
Pick a card blank, mine is one that is 3x5ish size. Make a mock up card front in your photo editing program, laying out the papers & elements that you would like to use. Then drag the individual elements into a Letter sized page so you can print them all on one page.
I left the background papers clipped together since I wasn't planning on putting anything behind them.

Print & cut out all the pieces.

I folded up the "Birthday Girl" paper into small equal sections, this is going to be a 1/2 rosette for the cupcake to rest on.

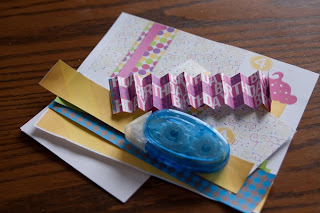
After adhearing the papers background to the card blank, I folded the ribbon with some spontaneous folds, making sure that the white backing from the paper wasn't showing through.

Now to make the 1/2 rosette for the cupcake base. Run a line of adhesive, I'm using a 'tape runner' type today, along the edge of the 'papers' & press 1 end of the paper onto it, matching up the edges.

Fold the other end around matching up the edges & press to secure.
Next thread the folded up ribbon through the center of the rosette & secure the ends near the edges of the card blank. The center of the card will be pretty loose because nothing in the middle is adheared yet.


Place the cupcake on top of the rosette, near the center. I like it, but it needs something else. I decided to put another rosette into the corner, a smaller one underneath the larger rosette just for some added color & depth.
Using scalloped edge scissors I cut a thin strip of the yellow paper & made tiny, even folds for the whole strip.

Then glue the ends together making a circular piece of paper.

Cut a small circle of scrap paper & use it to secure the back of the rosette, pressing one edge into the center to make the flower.
Glue the rosette into place under the larger 1/2, secure the cupcake & the word art. Embellish with tiny crystals for 'sprinkles'.

Subscribe to:
Post Comments (Atom)


0 comments: